These simple tips will help you learn how to draw in anime style even from scratch.
How to draw a portrait in anime style
What you’ll need
- A simple pencil;
- eraser;
- paper – it is better to take a density of 140 g/m2. Thin paper for printing on the printer quickly shrinks from frequent corrections.
First, let’s deal with basic anatomy in anime. Characters usually have a pointed chin, low forehead, small lips and nose. The main accent is the eyes. They are much larger than those of real people. It is easy to draw a portrait using simple geometric shapes such as a circle and an oval.
Draw a circle and draw a straight vertical line through its center. It is necessary for the symmetry of the face. Add a cheek and chin line. It should be slightly smaller than the circle in width.
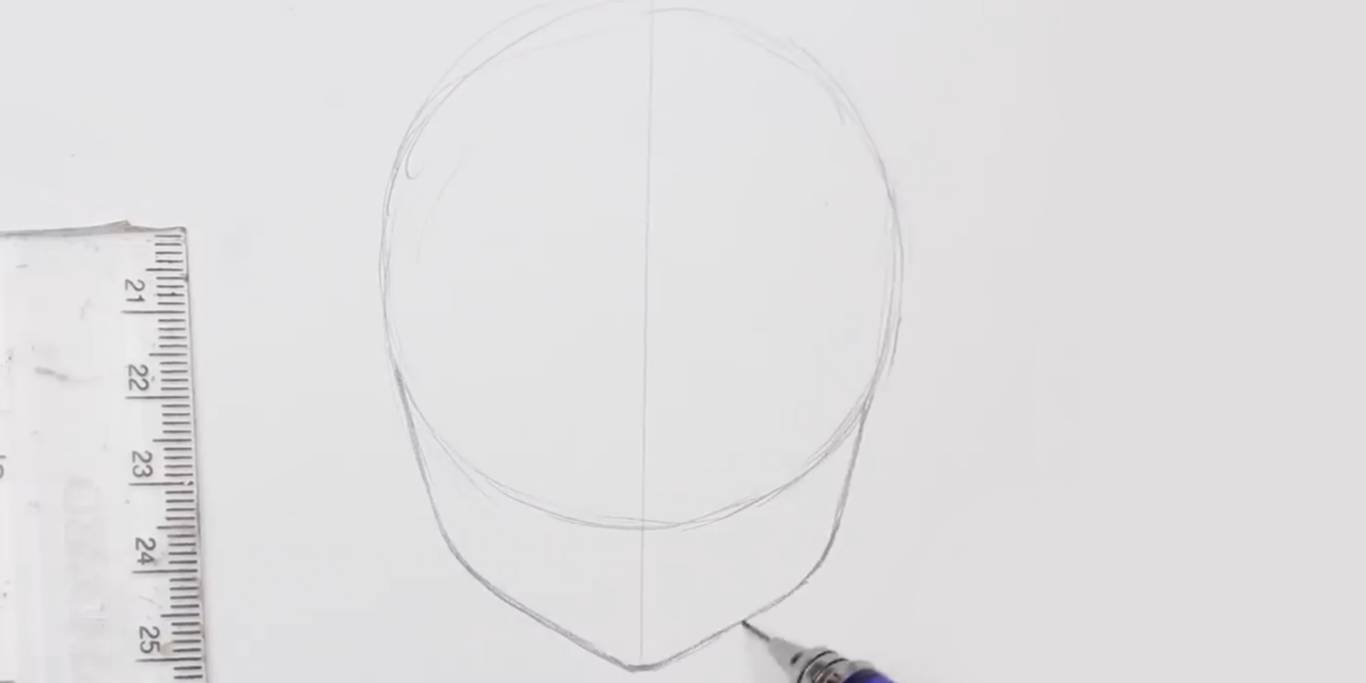
Frame: Shinigami Arts / YouTube
Draw a straight horizontal line in the middle of the resulting face. Below the line, draw the ears. To make them look more believable, do not draw them as a simple oval – the shape of the ears is more complicated. The widest part should not be in the center, but slightly higher.
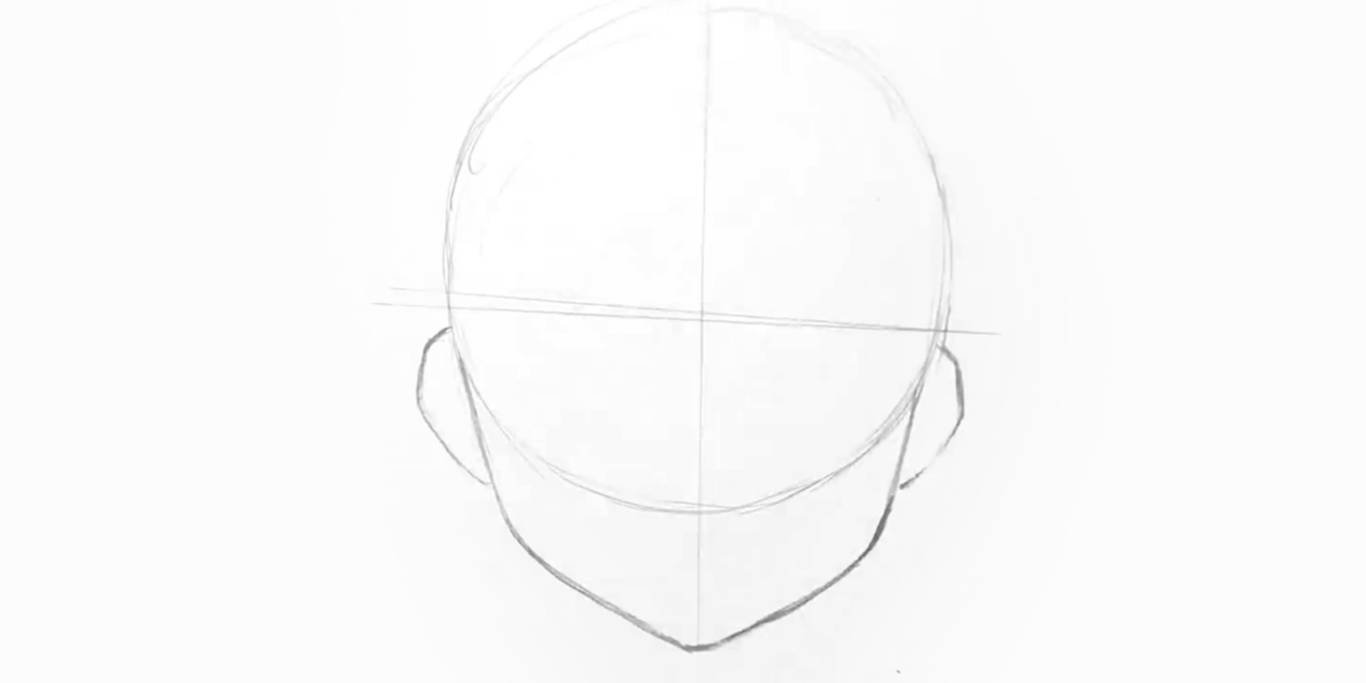
Frame: Shinigami Arts / YouTube
Find the center of the ears and draw another horizontal line from one point to the other. Between the two lines will be the eyes. Eyes of different shapes are found in anime, but the classic version is closer to an oval. Strengthen the upper line and add eyelashes. It is not necessary to draw them in separate strokes – it is better to draw several bold lines from the eyelid. In the corner of the upper eyelid eyelashes should be more, and on the lower eyelid they can only be marked.
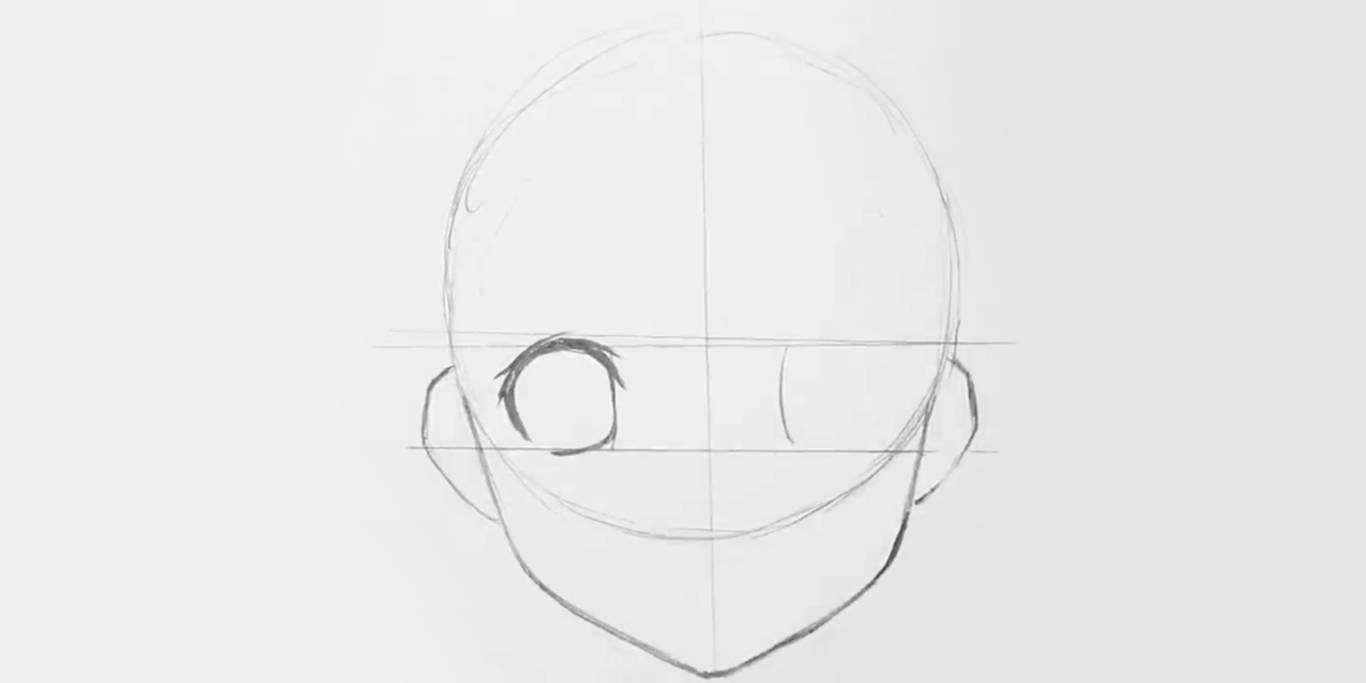
Frame: Shinigami Arts / YouTube
If it’s difficult to achieve symmetry when drawing the eyes, work on them simultaneously. That is, do not draw one by one, but sketch the upper line of one eye and immediately go to the other. Then go back and draw the bottom line, and so on.
Inside the eye, draw an oval iris – it will take up about ⅔ of the space. Outline the pupils and add highlights – it is important that they are on the same side.
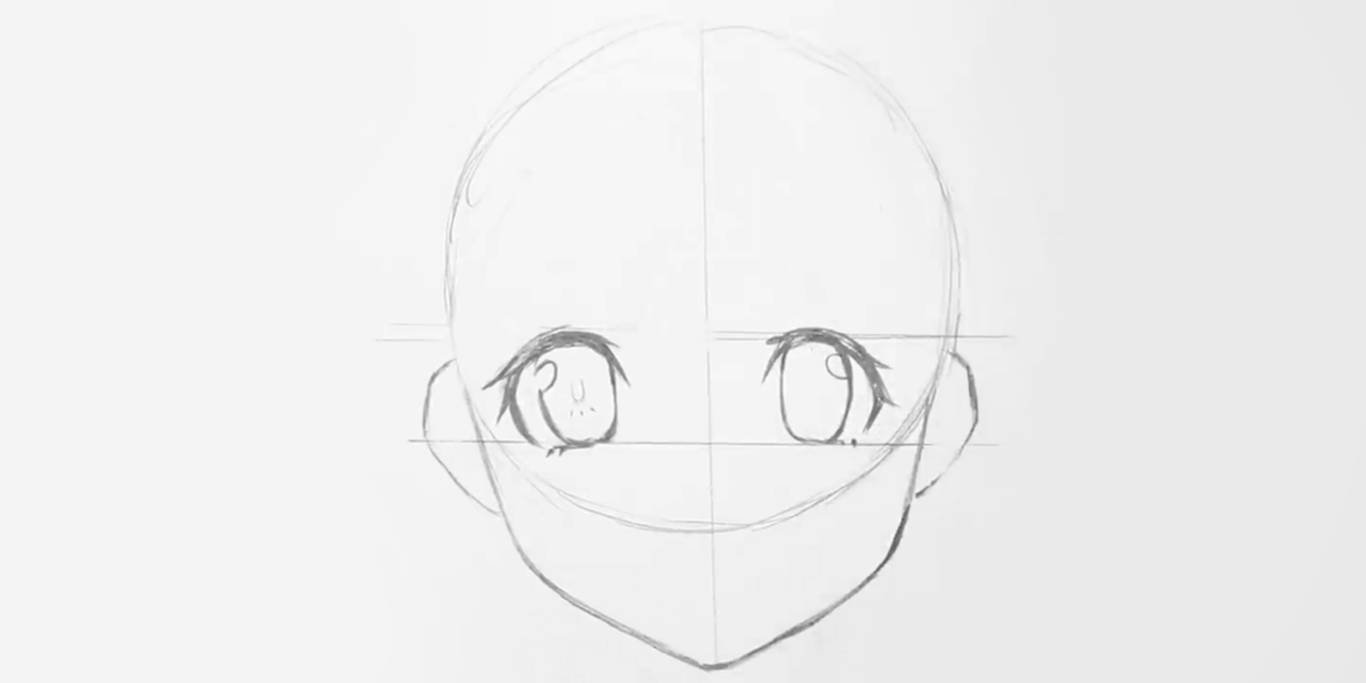
Frame: Shinigami Arts / YouTube
Outline the nose with a small triangle. It should be right in the center. The lips can be depicted with a curved line, reinforced towards the ends.
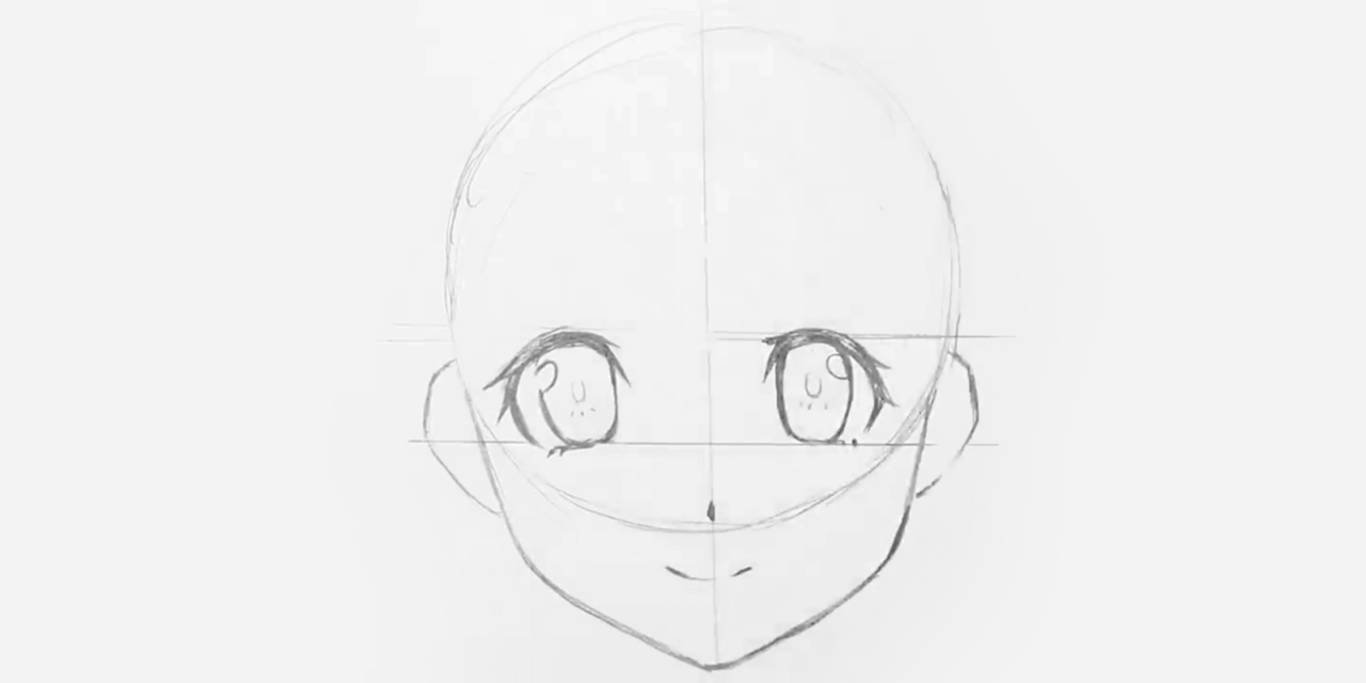
Frame: Shinigami Arts / YouTube
Draw the eyebrows with two thick lines that tend upward. Outline the upper eyelids.
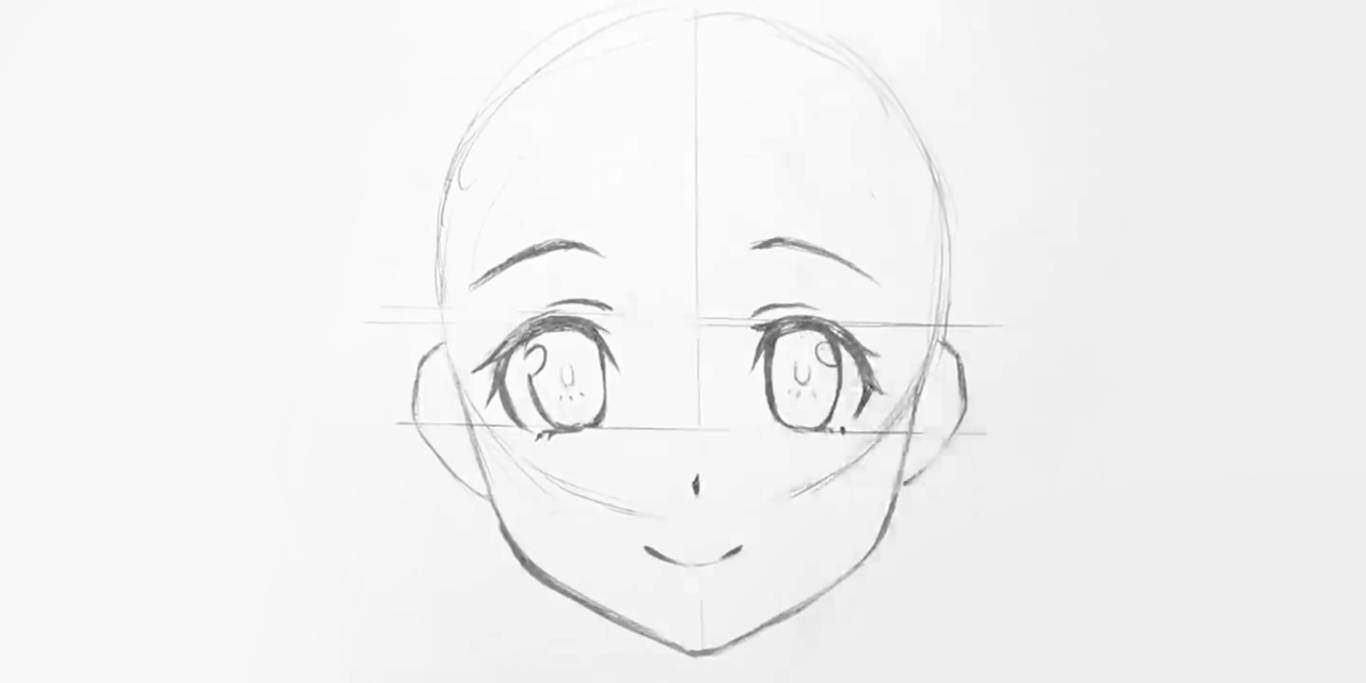
Frame: Shinigami Arts / YouTube
Add the details of the ear – the curl of the auricle, the goiter. Now you can erase the auxiliary lines and the drawing is ready!
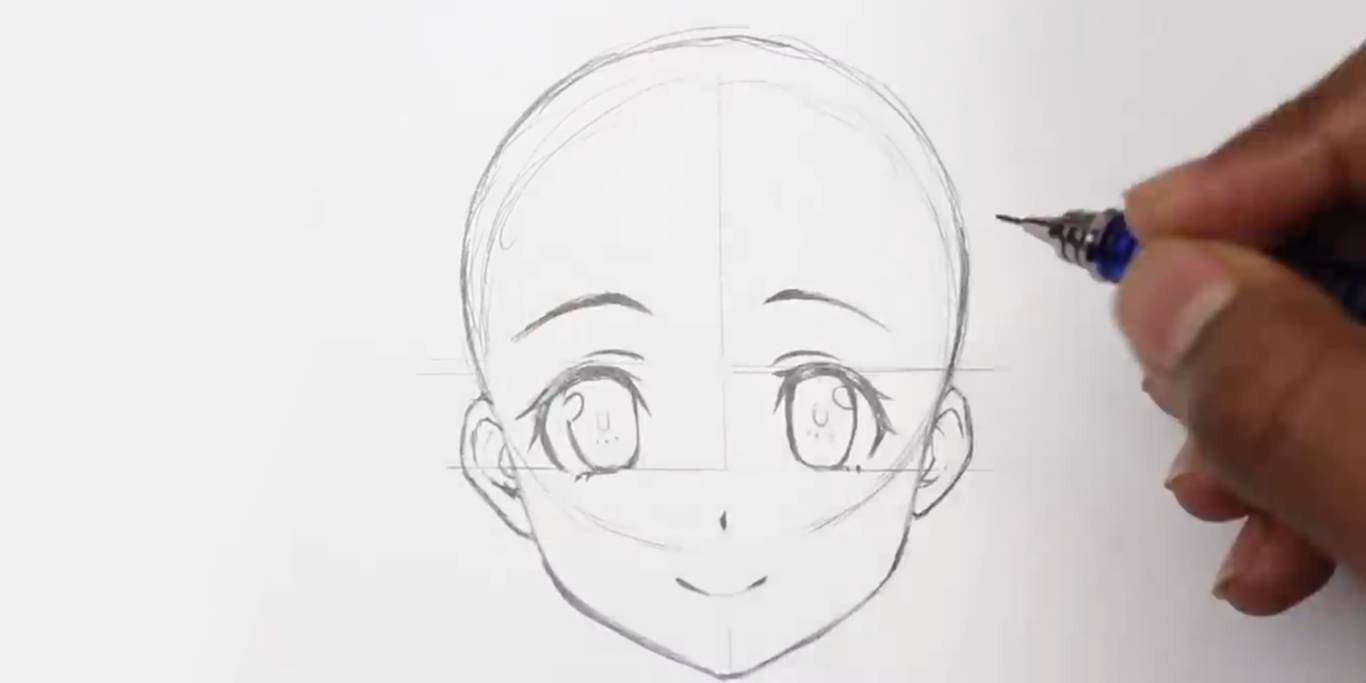
Frame: Shinigami Arts / YouTube
You can watch the entire workshop here.
How to draw a person’s hair in anime style
What you’ll need
- A simple pencil;
- eraser;
- paper.
There are different styles of hairstyles in anime. The simplest option is to mark the hairline and add a light tone.
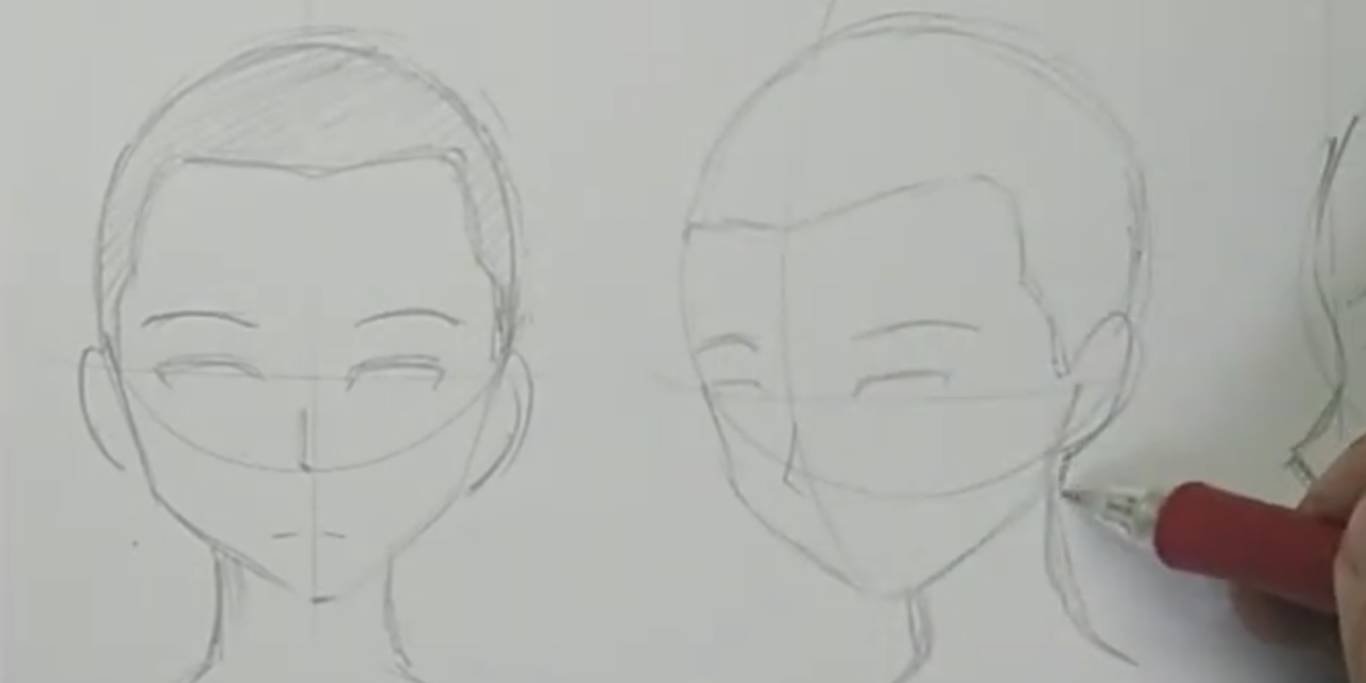
Frame: Shidzilla / YouTube
Short, shaggy hair can be shown in separate strokes. To make the character look believable, leave room for the forehead. The hairline should be wedge-shaped, not straight.
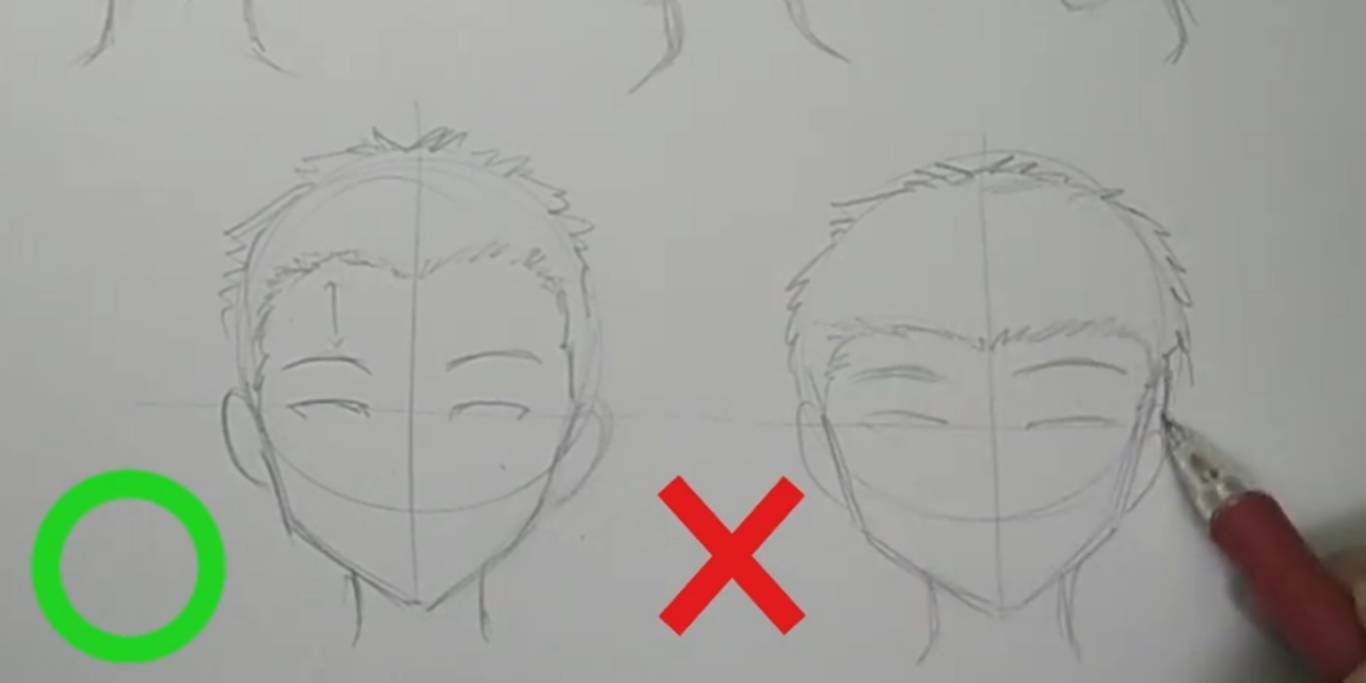
Frame: Shidzilla / YouTube
To draw long bangs, step to the left of the center line of your face. Do not draw individual hairs, but entire strands. Make sure they all fall in the same direction.
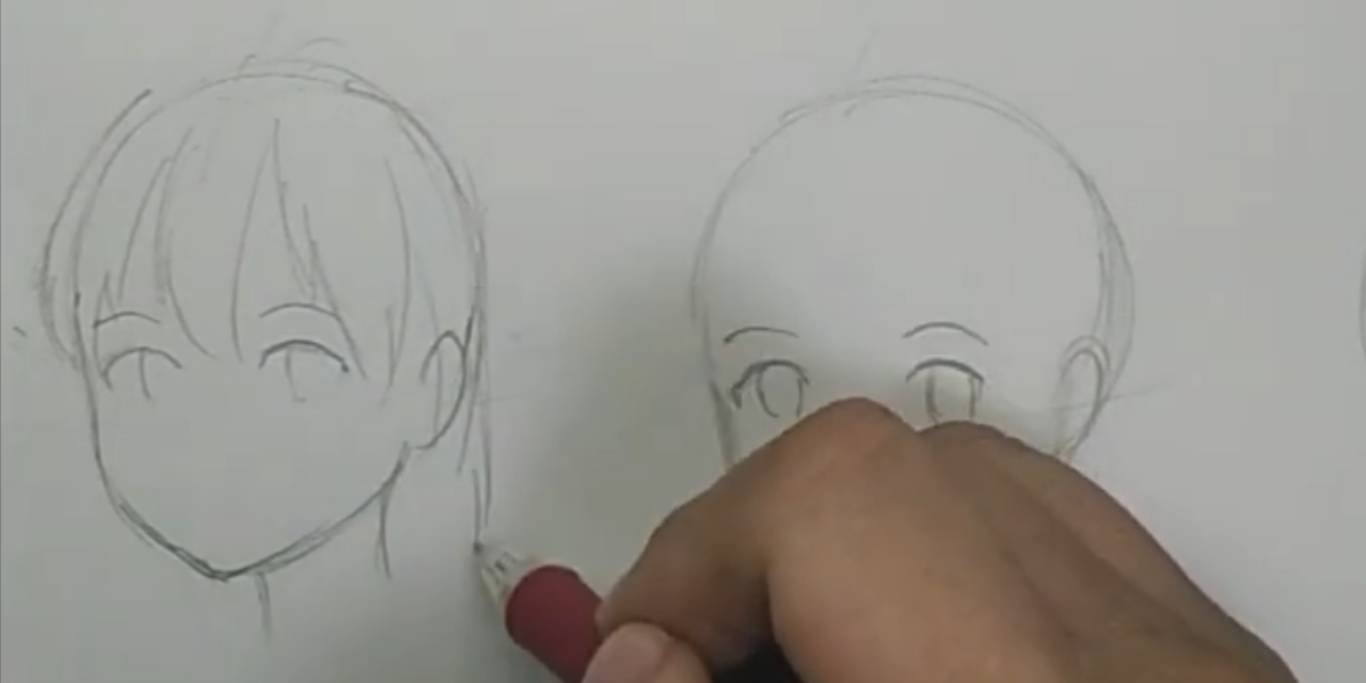
Frame: Shidzilla / YouTube
Strive to ensure that the lines are not “chunky”. To do this, they should be drawn in one movement. It is easier to do this if the movement comes from the elbow instead of the wrist. Draw the hair just above the borders of the skull to show its volume.
You’ll find a full explanation in the video.
How to draw a human body in anime style
What you’ll need
- A simple pencil;
- eraser;
- paper.
Exaggeration is present in the depiction not only of the face, but also of the body. For example, female characters are often depicted with wide hips, very thin waist and disproportionately long legs. The male figure is more angular, with shoulders wider than the pelvis.
To measure body proportions, artists use head height. That is, they look at how many heads “fit” into the torso, arms, and legs. In anime, the ratio of 1 to 8 or 1 to 6 is more common. But there are some exceptions. For example, if you want to draw a character in the chibi style – with a small body and almost commensurate with his head, the ratio can be 1 to 3. But we’ll look at how to create the more common 1-to-6 ratio.
Divide the sheet into six equal parts. Add dotted auxiliary lines at a distance of 1/4 from the main lines. In the first block draw an oval – this will be the head.
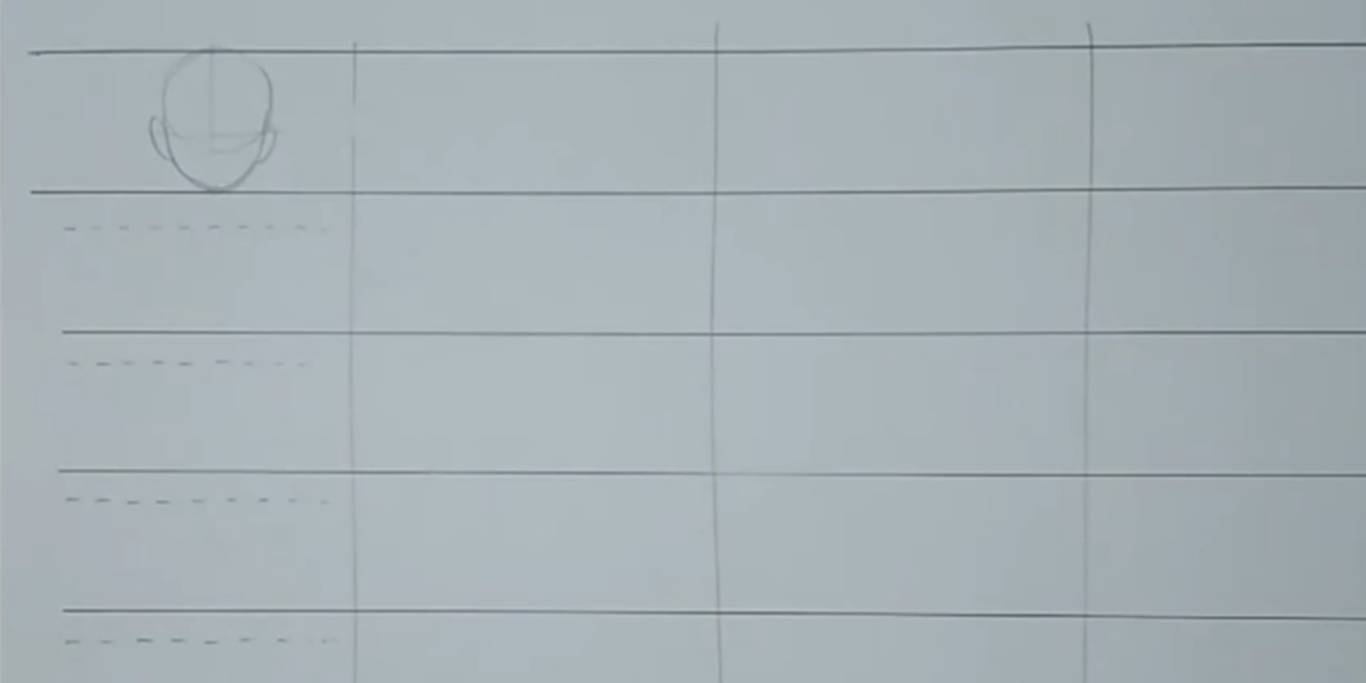
Frame: Shidzilla / YouTube
Start drawing the torso from the auxiliary line in the second block. Mark the waist and continue to line 4. Don’t make the torso too angular – you don’t see such shapes in life.
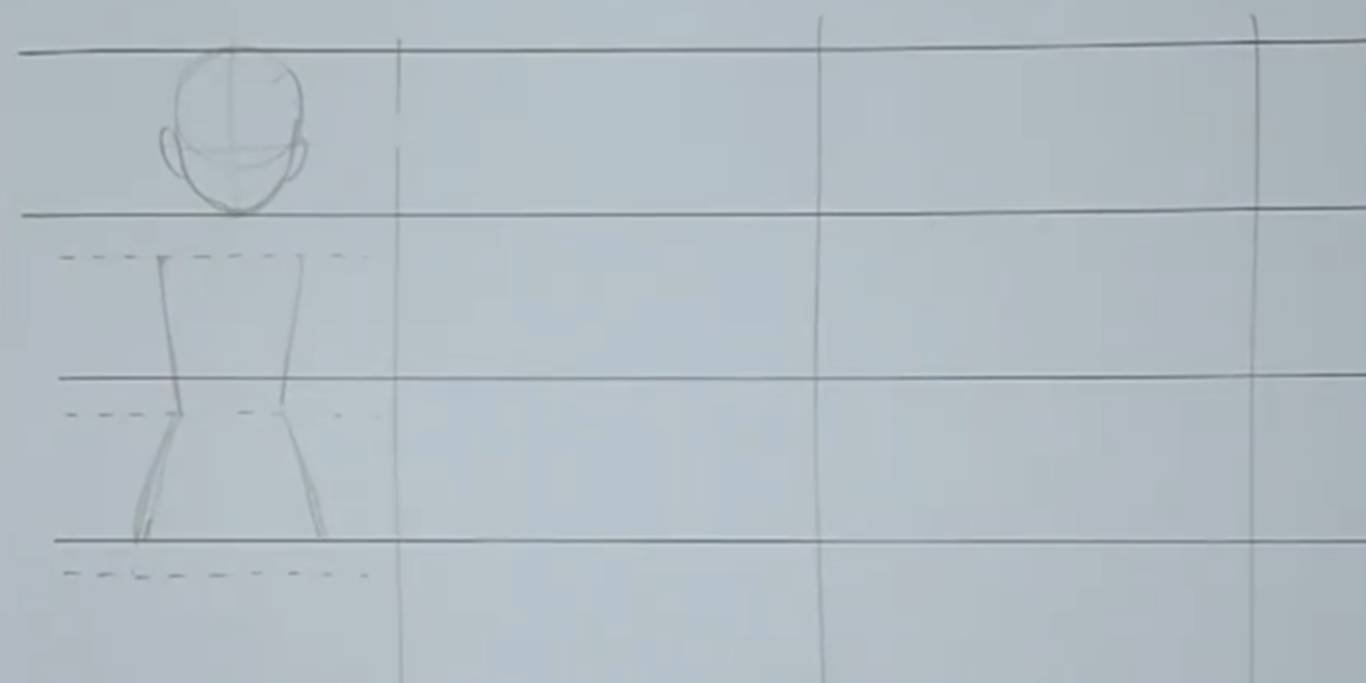
Frame: Shidzilla / YouTube
To make the shoulders, draw two circles at the point where the torso begins. The top of the arm will extend to the dotted line in the third block. The elbows can also be marked with two circles.
Draw the forearm and hand. The fingers can be labeled schematically. In the standing position, the hand will end on the dotted line in the fourth block.
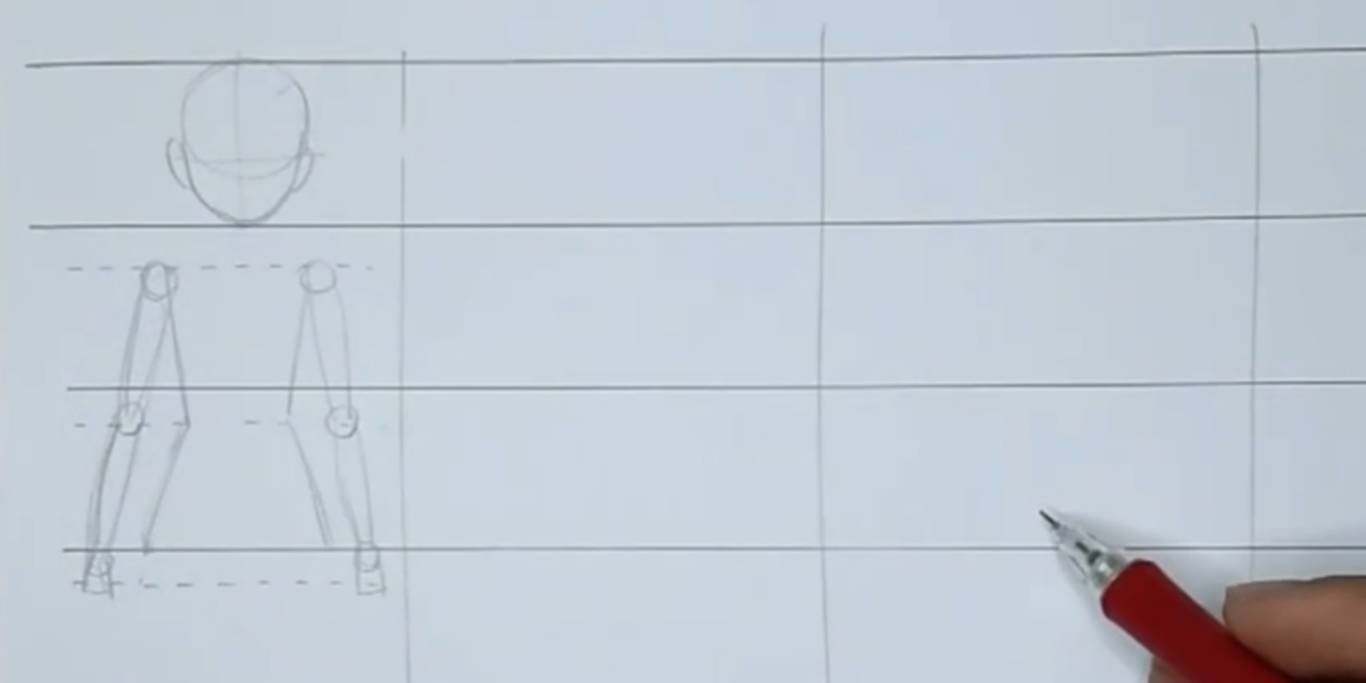
Frame: Shidzilla / YouTube
To make the limbs look natural, don’t draw them in a single rectangle. The anime has a simplified anatomy, but it’s not completely abolished. If your character doesn’t have very muscular arms, the upper part will be relatively equal in width. The forearm should extend from the elbow and taper to the wrist. Draw the neck in the space between the head and shoulders.
The hips will start from the torso to the auxiliary line in the fifth block. Knees can also be marked with circles.
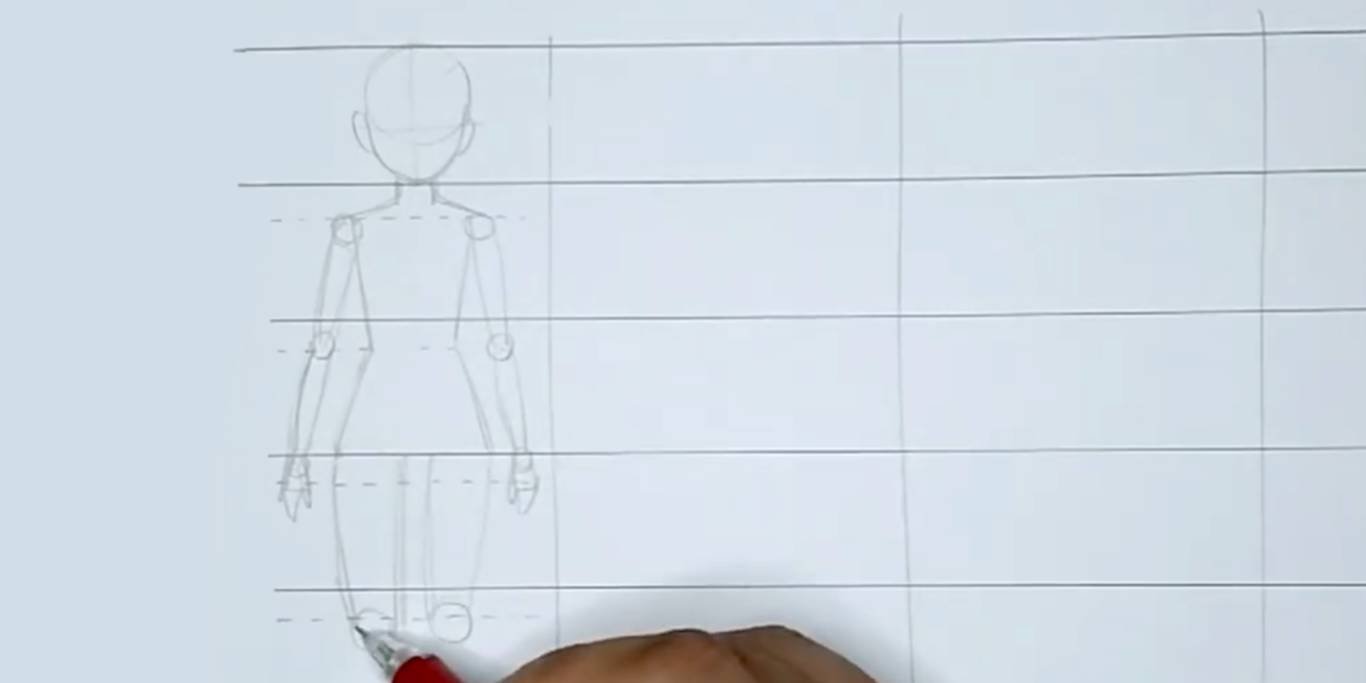
Frame: Shidzilla / YouTube
The remaining space will be occupied by the shins and feet – the latter can be schematically labeled as quadrilaterals.
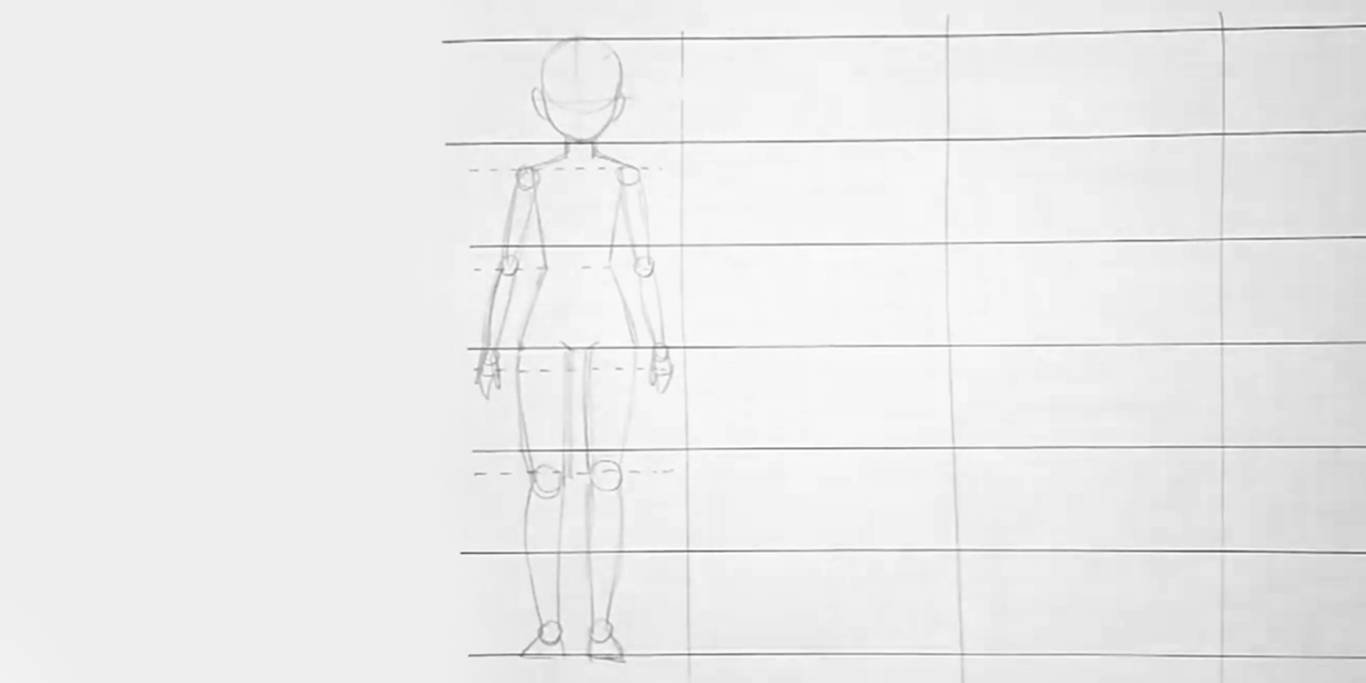
Frame: Shidzilla / YouTube
Full instructions with tips on how to train your hand before drawing to make confident strokes can be found here. The video shows how to draw different body types in the remaining cells on the worksheet.
How to draw clothes in anime style
What you’ll need
- A simple pencil;
- eraser;
- paper.
A common rookie mistake is to draw “levitating” clothes that have no folds. Things should not look flat because people are voluminous. The direction of the clothing lines will be the same as the body lines. To make it easier to draw, look for references – for example, a picture of a person wearing a T-shirt similar to the one the character will be wearing.
Outline the creases in the armpits and chest.
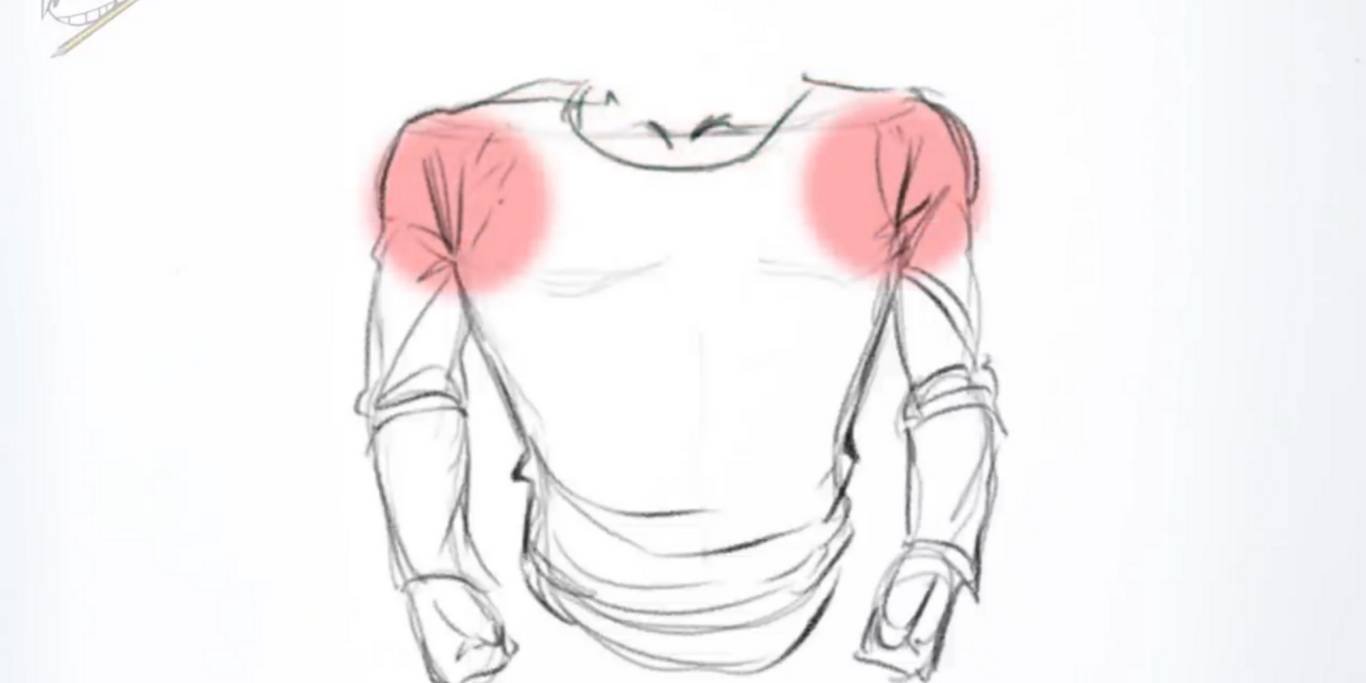
Frame: Draw like a Sir / YouTube
If your character has an impressive belly, the clothes should be tight. If your character has an impressive belly, the clothes should fit snugly, and if he or she is lean, the T-shirt will fall loosely over it and create a few more folds at the bottom.
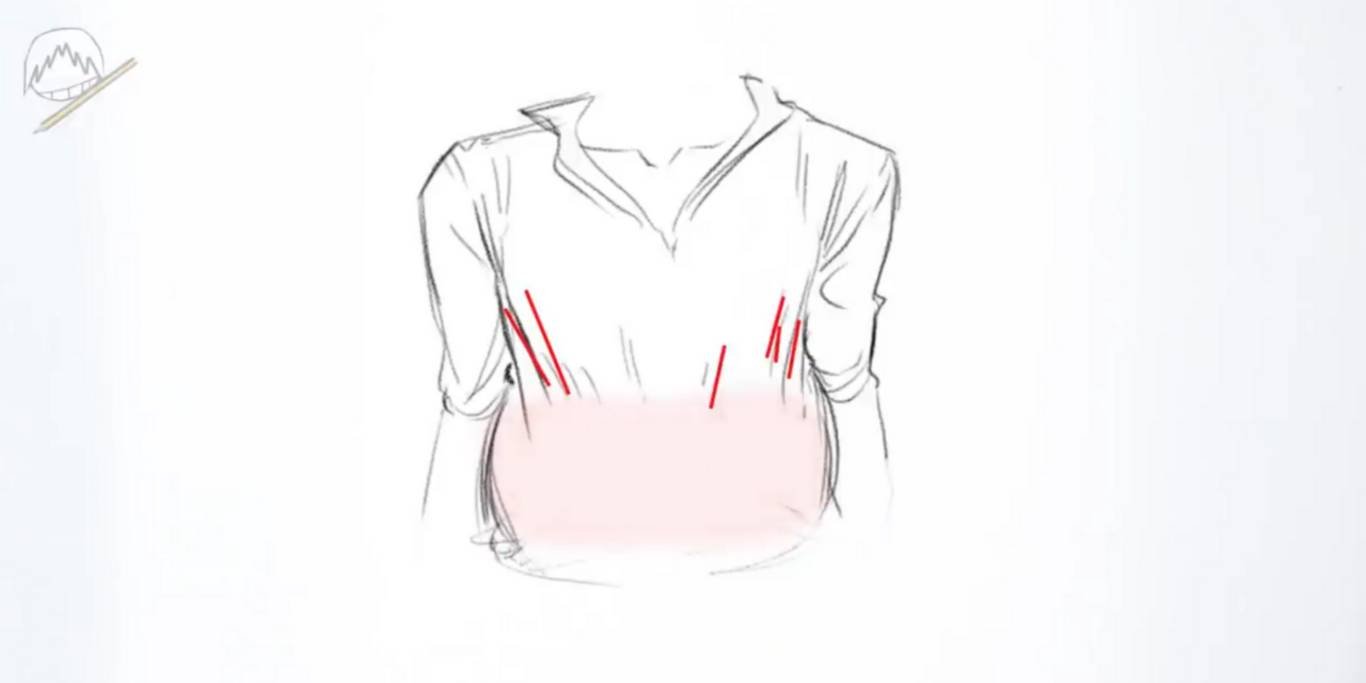
Frame: Draw like a Sir / YouTube
To draw long sleeves, add a crease at the elbow bend.
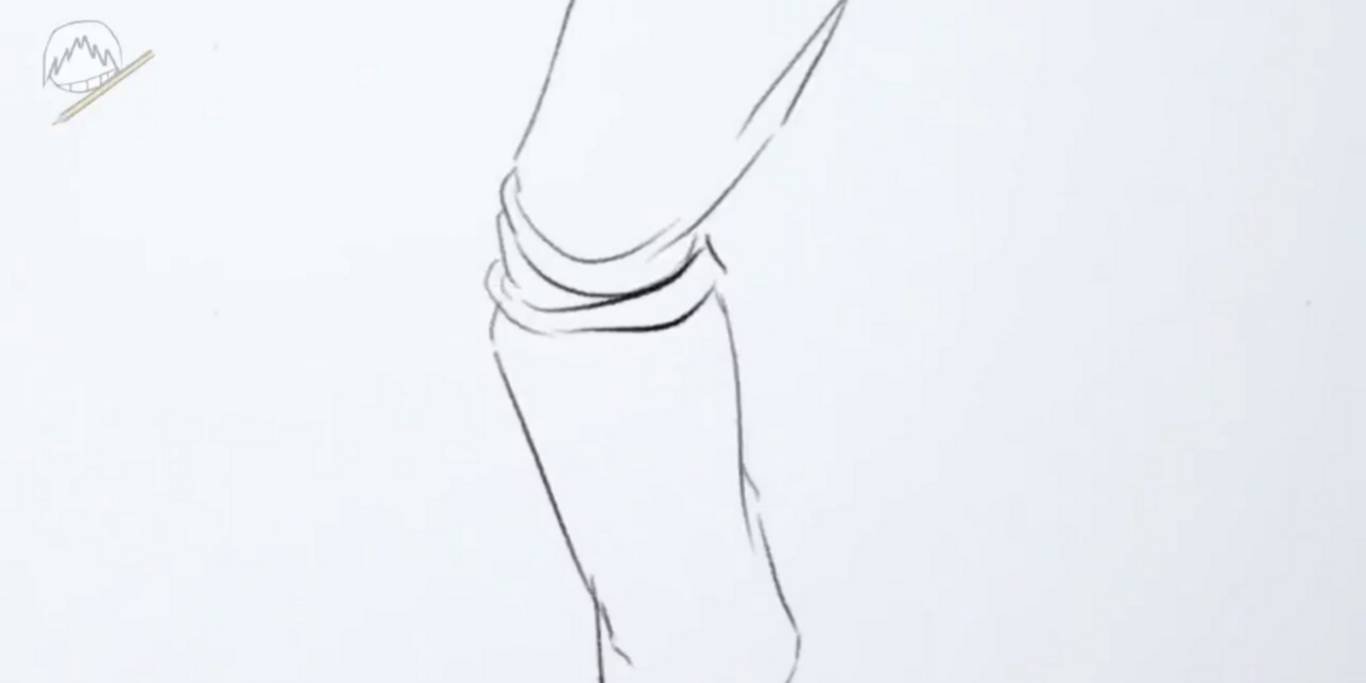
Frame: Draw like a Sir / YouTube
If you want to depict loose clothing, draw fewer folds. If you want to depict loose clothing, draw more folds.
You will find a detailed explanation in this video.
How to color a character in anime style
What you’ll need
- Colored pencils;
- liner;
- an eraser;
- your drawing.
If you made the sketch with a pencil, you can trace it with a ruler and erase all the excess before you start coloring.
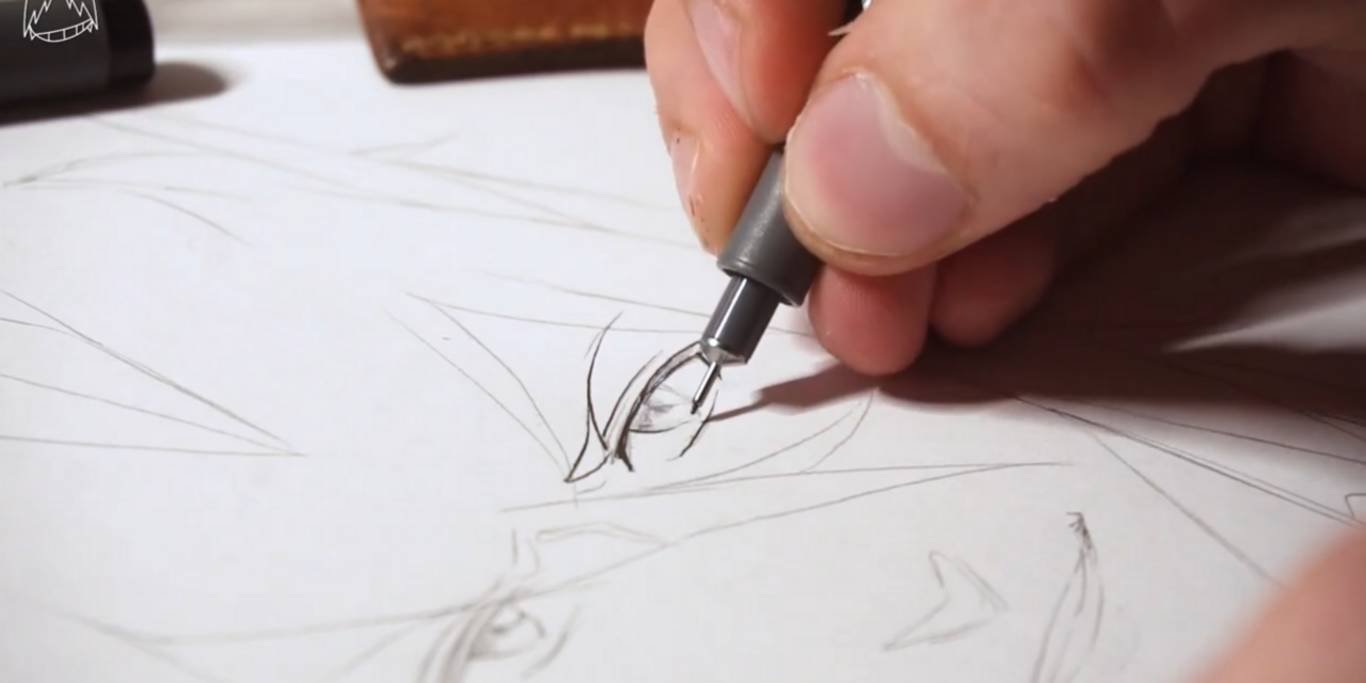
Frame: Draw like a Sir / YouTube
You can color the character with any material you have at hand: watercolor, alcohol markers, gouache. But in this example we will consider how to use colored pencils. Their advantage is that only a few colors are enough to work with. In addition, a pencil drawing is easier to correct. And it is also important that the lead is sharp, so that the color will lie better on the paper.
First, paint your face and hair with a uniform light color. Do not press the pencil too hard – light circular movements are enough.
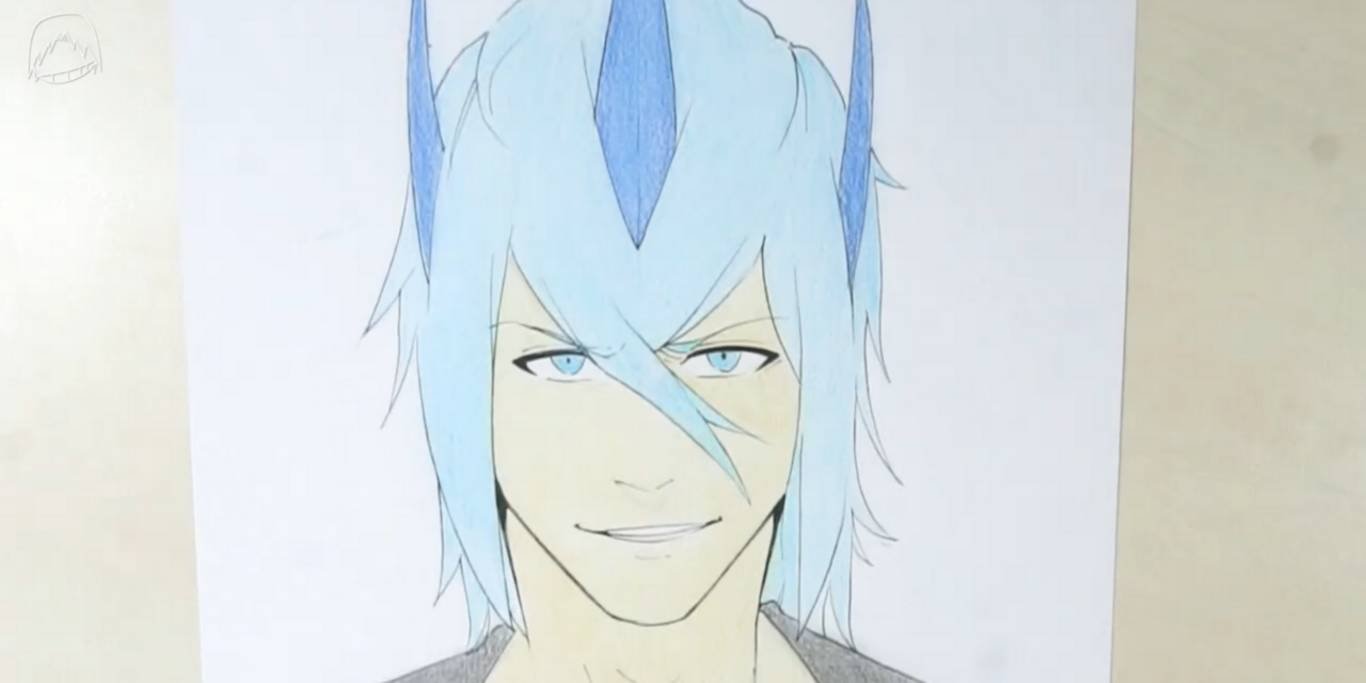
Frame: Draw like a Sir / YouTube
Now we can start with the shadows. Their location depends on the light source. For example, if the face is lit from the left, the deepest shadows will be on the right side, where the light does not hit.
To draw shadows, do not choose black or brown colors, as they will turn out too sharp. You can use the same pencils that you used to apply the main tone, just press them harder. To start, draw light lines on the shadow.
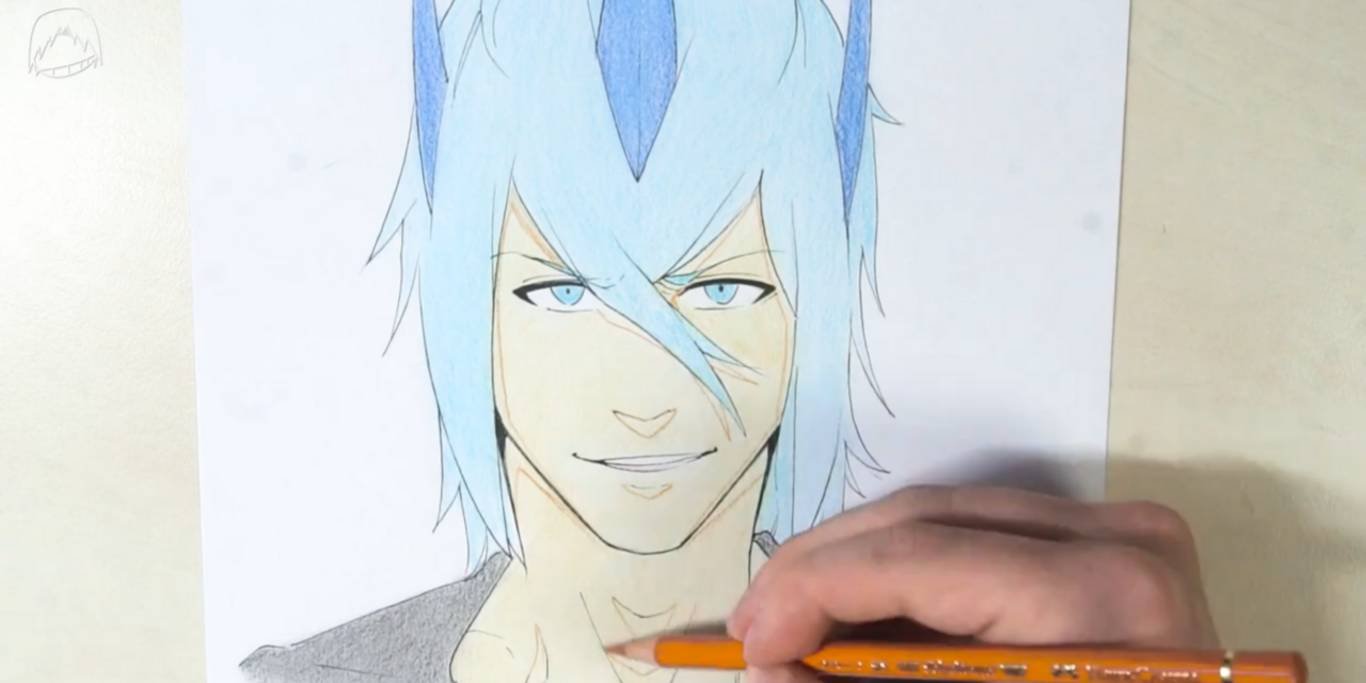
Frame: Draw like a Sir / YouTube
Now you can color them in. Do not hatch chaotically in different directions, because the picture will look sloppy. For a more realistic drawing you can make soft shadows – to do this you need to loosen the pressure on the pencil when moving to the light.
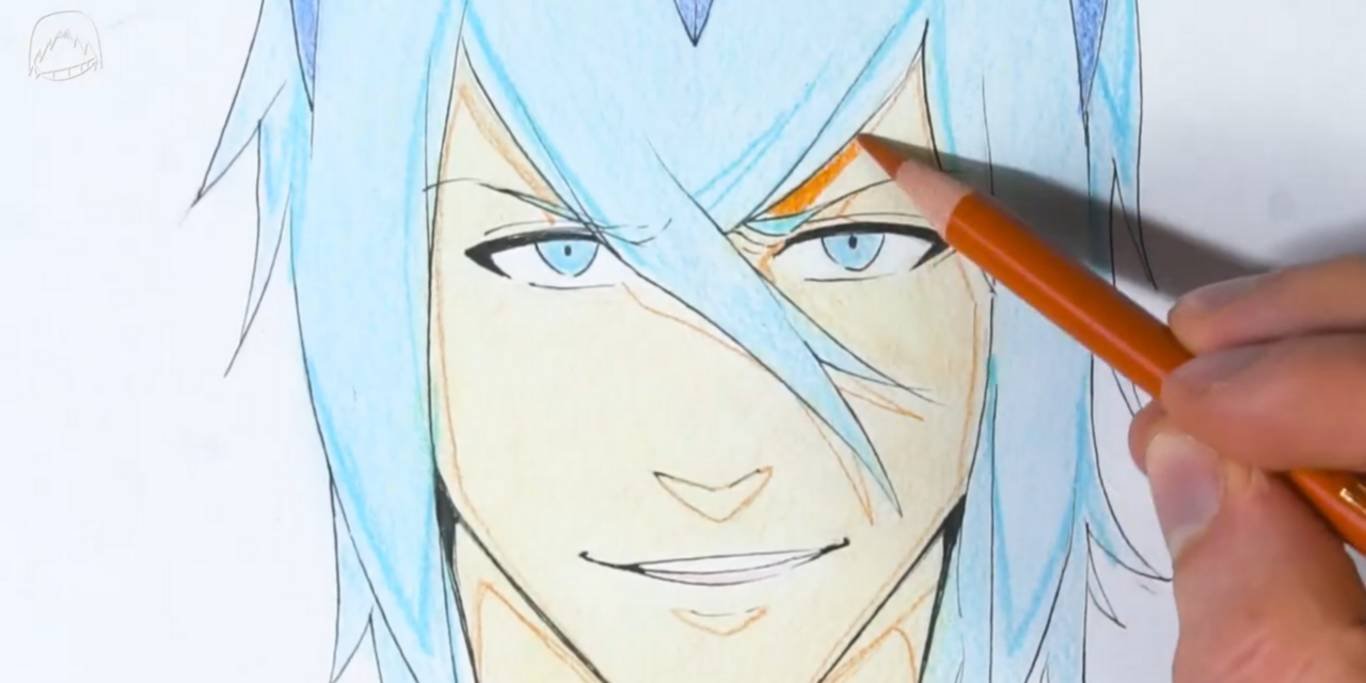
Frame: Draw like a Sir / YouTube
Add highlights to the eyes, lips and hair with a white gel pen.
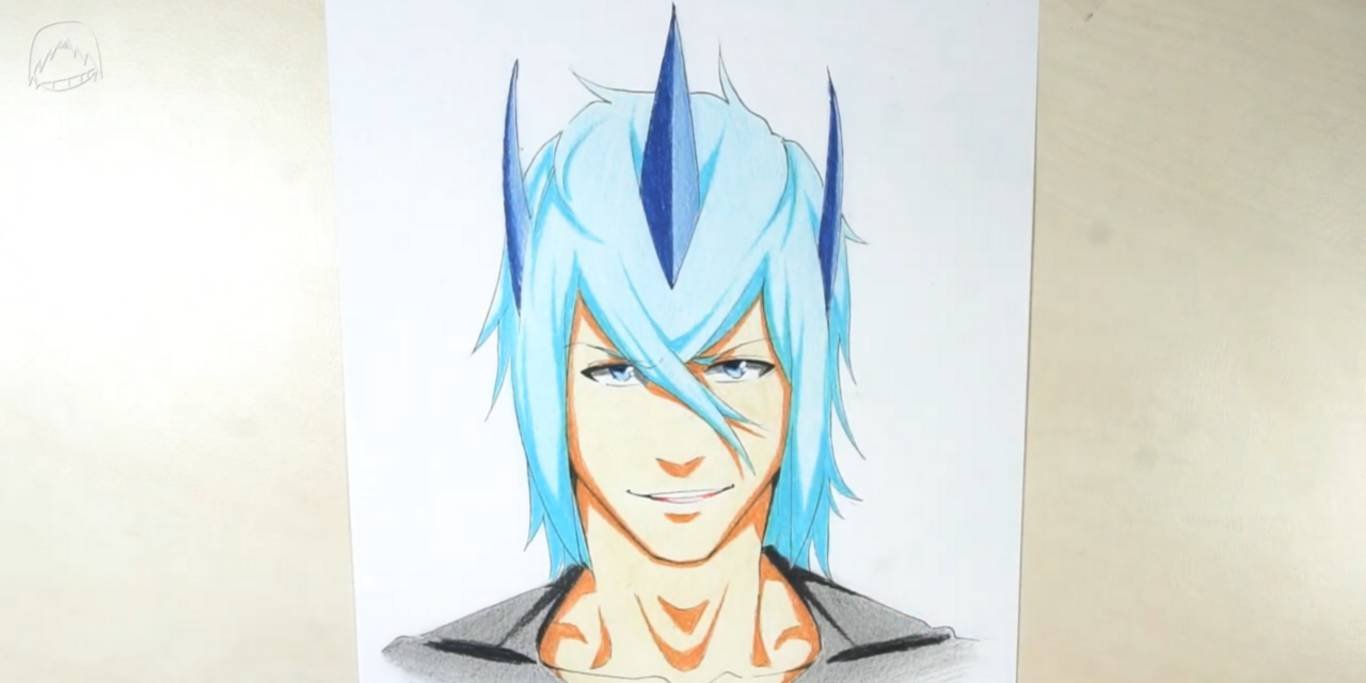
Frame: Draw like a Sir / YouTube
You’ll find more helpful tips in this video.

